Hello Everyone! I decided to take another crack at making sandwich bread. The first attempt wasn’t bad, but it didn’t turn out like I had hoped it would. I decided to use a different recipe for my second attempt. The recipe I used was called “Easy One Day Sourdough Sandwich Bread” from the website ‘She’s Trippy’ and I found it on Pinterest. If you are not already using Pinterest then I highly recommend you do! There are several recipes on there that you can make with your sourdough starter. I made my first bread attempt on November 5th and Fernandough has been in the fridge ever since then.
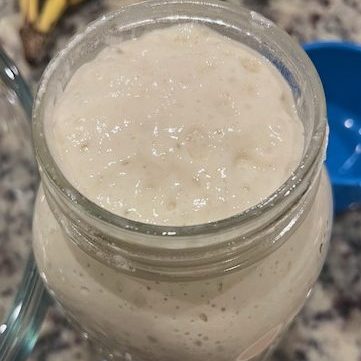
I was really nervous about how Fernandough would react to his first feeding after being in the fridge. It had been almost a month since I had the courage to attempt a second loaf. I decided not to discard anything and fed him 50 grams of filtered water and 50 grams of bread flour. I took him out of the fridge Saturday night since I wanted to bake with him on Sunday. The weekends are the only time I am able to focus on my sourdough baking since I work a full time job during the week. I could try to juggle it around work, but honestly that sounds overwhelming and I wouldn’t be able to enjoy it as much.
My friend Darci was the one who told me about using bread flour instead of all purpose flour when feeding your sourdough starter. Another tip she gave me was to put my sourdough jar in a fuzzy sock to keep it warm. The point of keeping your sourdough starter warm is the same as wanting your bread dough warm…..TO HELP IT RISE! I wasn’t able to try this because I didn’t have any new fuzzy socks at the time and the idea of using a used sock even if it was clean made my stomach feel queasy. I opted for hand towels and used a hair tie to help keep it in place.

I checked on Fernandough the next morning and could not believe how much he had risen!!
When I took the lid off, I thought he was going to leap out of the jar! Haha. I woke up early so I could have the bread dough do the first rise while I was at church and running errands.
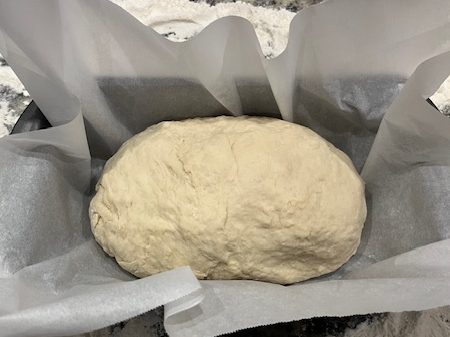
The ingredients called for: Water, Starter, Honey, Oil, Salt, & Bread Flour. I didn’t want to use oil so I substituted butter. After mixing everything together, I kneaded the dough for about 5 minutes or so before placing it in the loaf pan to rise. Please see the recipe on my links & supplies page if you would like to try it out. I placed my bread on parchment paper before transferring to the loaf pan. I use parchment paper for easy cleanup and it ensures my bread will not stick to the bottom of my pan.
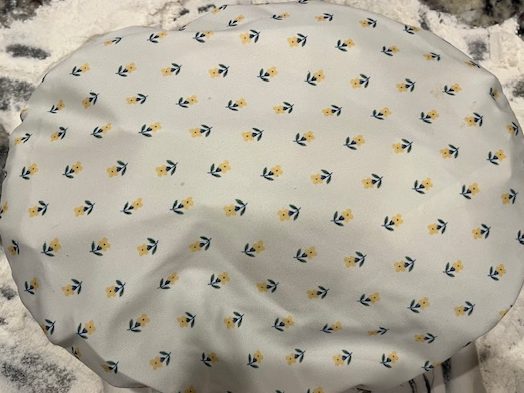
I covered my dough with a reusable bowl cover and you can get these off Amazon or Walmart. I purchased my Esembly Bowl Caps off of Amazon and I have added the link to my links & supplies page.
I let it rise the full 8 hours that the recipe called for, but it still wasn’t over the rim. If you read my last bread post then you know I had this same issue. We are in December and have colder weather so I decided to crank up the heat in the house and let it sit another hour or two.

If you’re wondering what the poked holes are, I had just purchased a food thermometer and was testing it out. After a couple hours more, I placed my bread in the oven with another bread loaf on top. I secured the bread loafs using metal clips on each side. I am very happy with how my bread turned out!
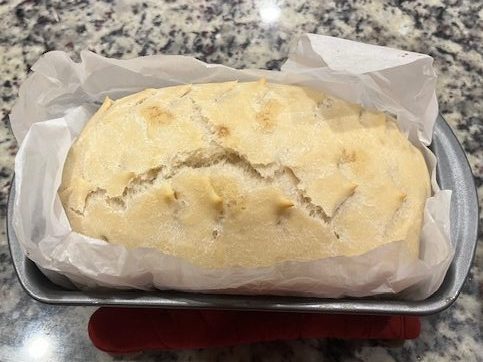
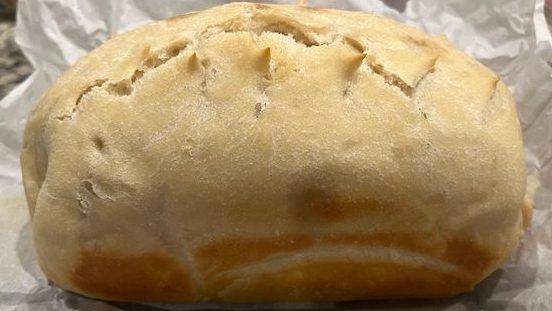
I tried to do a fun design with my food scissors, but it did not turn out good. Eventually, I will get a scoring tool so I can make all the fun designs I see everyone doing. I highly recommend this recipe and will be making it again! The only thing I would change is to take the top loaf pan off for the last 20 minutes or so to brown the top of the bread. Stay tuned to see what I make next!
Sincerely,
Tiara


Leave a comment